The Business of Art

_MG_5646

During my recent visit to Sydney I popped into one of my fave hangouts, the Art Gallery of NSW and headed straight down to the photographic exhibitions (why do galleries always bury photography exhibits in the basement?). I was surprised to find a number of pieces by Andreas Gursky, who’s name didn’t mean much to me until a few years back when one of his photographs sold for over 3 million dollars. While contemplating the huge print of “Chicago, Mercantile Exchange” (it was estimated to sell for over five hundred thousand Euros), I got to thinking about the first time I presented my photography to the owner of the Red Square Gallery in Cape Town. I now cringe at the thought of how naive I was; I just arrived at the gallery without an appointment, my work was very poorly presented and was very higgledy-piggledy to say the least with no structure or cohesive theme. The gallery owner was very polite in rejecting me but it took me ages to come to terms with it. So how do you go from aspiring artists to commercial success?
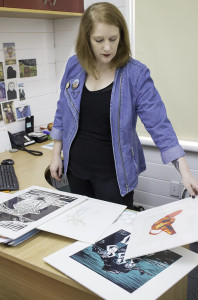
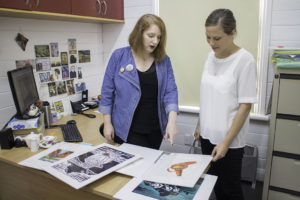
_MG_5649I decided to find out more about this “business of art” so I headed off to have a chat with an expert in the field. I managed to track down Lisa Rodgers, the curator and general manager of Lake House Arts in Takapuna, who has been involved in the business of art for many years. I started by asking her how artists should go about approaching a gallery with the intention of getting their work accepted for exhibition. “What I’ve developed over the years is an exhibition proposal guideline document that asks about the artist and their practice, some images of their work and an artists CV that covers details like where you have exhibited and where you studied” explains Lisa. As a professional in the world of art, she undertook a research project around how artists should best approach galleries, casting her net far and wide to cover both private sector and publicly funded institutions. When the results were distilled, this seemingly daunting task came down to a few simple guidelines; “Make an appointment. I get a lot of artists coming in with a whole lot of artworks in their car and have the expectation that I can drop everything and have a half hour chat with them. While I’d love to do that as it would make my life much more fun, in reality it doesn’t work like that. If you want to get picked up by galleries and get exhibitions and you want to ultimately make sales and gain a reputation and get yourself out there, you need to treat the way you do it as a business” adds Lisa.

So, there was this thing again, the business of art; being professional. Isn’t art all about messing about in your studio and being all creative and stuff? Aren’t artists allowed to be, well, just arty and happy go lucky? Lisa has some strong views on this. ”Being arty and disorganised is a bit of an excuse. It comes down to professionalism, being organised. If you say you will deliver something by a certain date then you need to stick to that. My exhibition contracts will have a timeline of when things need to be delivered so there’s no excuse.” Lisa is herself an artist and prides herself on being organised and professional about her own art. “It’s a skill that can be learned and more institutions are including this in the art courses which is evident in the many emerging artists that I deal with. So there is no excuse. If you follow the guidelines and deliver the information that I ask for, you’ll probably get an exhibition. If you want to do this as a career, you can’t think about it as a hobby.”

There are many community galleries similar to Lake House Arts that operate on a ‘not for profit basis’ and are constantly on the lookout for new and exciting works by a wide range of artists. But bear in mind that these facilities have limited wall space, time and resources, so there is fair competition that you will be up against. Lisa concludes, “there is a good chance of getting your work exhibited if you follow the simple guidelines outlined by the gallery.”
_MG_5653Here are my top tips for succeeding at the business of art.

  1. Get organised – make sure you know what is expected of you when you approach a gallery
  2. Make an appointment – don’t just arrive and expect the gallery manager to be able to spend time looking at your boot load of artworks
  3. Read the proposal guidelines – most galleries make guidelines available for download or on their website
  4. Be reliable – know what is expected of you and by when and then deliver on time.
  5. Finished artwork – ensure that your artworks are ready to hang, not wet, incomplete or falling apart
  6. Artist’s biography – you should have a well-written artist’s bio ready to go. Get someone to proof read and help you edit.
  7. Artists CV – thius is different from you bio and should detail your experience as an artist including details of where you’ve studied, examples of your work and where you have exhibited
  8. Exhibition concept – a well thought out idea of what you are proposing that includes visual examples will go a long way to getting your work on the wall
  9. Photographs of your art – have a selection of images ready to go that closely represent your work for proposals and publication in catalogues
  10. Have fun – the more organised you are the more fun the business of art is.

So if your art is becoming a business it’s time to get up, dress up and show up to give yourself the best chance of succeeding. Go out there and create, print and share.

Expose Yourself

John Botton - Ready Made Frame I’m not sure about you but I always feel a bit self-conscious when exposing myself to other people, especially in public. What I have found over many years though, is that it pays to ensure you are presenting yourself in the best possible light. OK, so maybe you think I’m a bit of a pervert… but what I’m actually talking about is showing my fine art photography (so who has the dirty mind now ;-). After labouring long and hard over your masterpiece it’s worth making the effort to present it with the same care and attention you took over its creation. After all, it’s often the packaging that intimates at the value of the artwork; much like a Michelin star chef who presents his fine cuisine, not as yummy food but as a work of culinary art.

As a fine art giclée printer I get to print some really stunning artwork and as a photographer, my presentation knowledge and experience is centred mostly around my own work. Custom framing artworks for display can be an expensive exercise and may be beyond the budget of artists that are just getting going, so I have come up with a couple of presentation ideas that should suite most pockets.

Materials:
Regardless of what presentation method you choose, the quality of the materials you use will play a significant part in the appearance and longevity of your artwork. Card stock, paper and tape all contain acid which will yellow over time, contaminate your substrate and may even render your work of art worthless. As with drawing materials, always select the best possible materials you can afford for preserving your works for future generations to enjoy.


John Botton - Polly Bag and BackingPolly Bag and Backing:
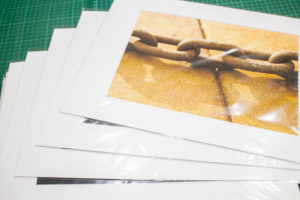
The simplest and most cost effective way of presenting your work is in a good quality re-sealable polyurethane bag with a stiff backing card. This is especially true if you are presenting your artworks at markets with loads of grubby paws flipping through display boxes. It protects the artwork and allows you to slap on an artist’s bio sticker with details of the piece. Just make sure the bags are crystal clear and of a high quality without any visual distortion.


John Botton - Matte DetailMatted and Backed:
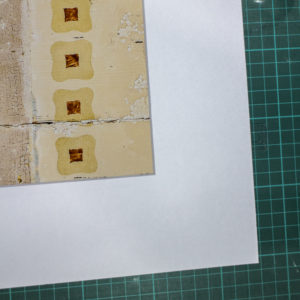
One step up from the polly bag and backing option is to have your artwork mounted in a custom matte board with foam board backing. Once again, select acid free matte board and tape to preserve the longevity of the work. Make sure that whoever does the matting for you practices conservation framing methods. The matte board will serve as a frame and with the right colour choice, focuses the attention of the viewer without distracting from the artwork. Unless your artwork has a unique dimension, the trick with matting artwork is making sure that the matte size can fit a standard frame size making it easy for the buyer to get it framed. The depth of the matte should also be appropriate to the artwork; here bigger can be better. A skinny matte border can appear cheap and not do your work any justice. If your art is on a handmade substrate or has a decal edge, floating the piece within a matte board will incorporating the edges of the paper in the presentation.


Mounted on Foam board:
This method takes a bit of planning, especially for original pieces, as you will need to allow for a border around the artwork on the page. It’s much easier done with giclée print reproductions or photographic prints where you have full control of the image placement and size on the paper. The effect is a simple and elegant presentation without any distractions. The trick with this is to ensure that the print is securely attached to the foam board backing and is best undertaken by a professional framing shop that has a vacuum mounting facility. Having said that, foam board is available in a self-adhesive option with good quality glue for the DIY enthusiasts.


John Botton - Frame and Matte detailsFramed and RTH:
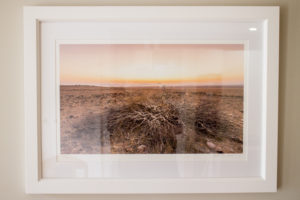
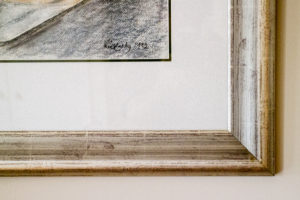
Ideally, your artwork should be professionally framed and Ready To Hang. This gives you the opportunity of selecting a frame that would best show off the piece without distracting from it. Frame mouldings can vary vastly in style and colour so it’s easy to overstep the mark; select a simple frame style in a colour that brings out the best in your work. Ornate hand-carved guilt frames are best suited to old masters works hanging in galleries and to be avoided. Simply put, your frame should enhance not overwhelm your artwork. Custom framing can be expensive but if you shop around you may find ready-made frames of good quality that fit standard paper sizes (this is the option I choose most). Steer well clear of cheap snap on or plastic frames; these will tarnish your artwork and diminish it’s value (rather go the polly bag or matte option). If your artwork requires glass protection you are faced with the choice of plain, non-reflective, acrylic or gallery quality glass each with their advantages and price points. Pay attention to the hanging components and ensure they are up to the job of supporting the weight of the framed image.


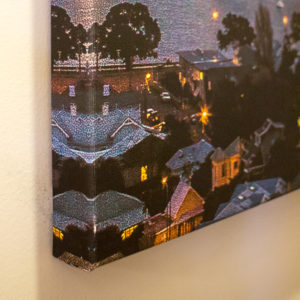
John Botton - Canvas EdgeCanvas Stretching:
Stretched canvas artworks should be gallery wrapped and are deemed to be RTH and usually don’t require any framing; but framing is an option that can add an elegant finish. When working on canvas, make sure that you continue the image around the sides or alternately paint the sides in a neutral colour; it is a part of the artwork after all. Saw tooth hangers make it easier to hang the image and are definitely less fussy than attaching a cable. Make sure your canvas is securely stapled at the back, even if it’s purchased pre-stretched and that the staples are covered with paper tape to finish off professionally.


Your approach would differ completely if you were presenting your portfolio as a body of work to a gallery or doing a private showing for a buyer. Here you would want your work to be presented with continuity in keeping with your style as an artist.

Now go out there and expose yourself… Create – Print – Share

Confessions of a Couch Photographer: 10 ways to get your Phojo working

As I staggered to the summit of North Ridge on my daily dog walk (OK, it was a hill that felt really steep) dragging two puffing bullmastiffs behind me, I fixated on the stunning cumulus clouds billowing upward into the heavens above the Auckland skyline to the South, the late afternoon light describing the subtle curves and nuances of every shade of white. In my minds eye I could visualise the framing and exposure settings of my photograph. I could even imagine the final print hanging on the entrance wall being admired by visitors. Alas, I had no camera with me and the truth be known, I was in a photographic slump. It was the equivalent of writers block or a bad case of stage fright. I had lost my Photo-Mojo or Phojo for short.

This got me thinking about ways to get my camera out and re-discover all the things that motivated me when I bought my first digital camera. It was a compact 4.5 mega pixel Canon Ixus. I carried that baby with me wherever I went, weekly shopping at the supermarket pushing the trolley for my wife, to work every day, out to social engagements (that’s a fancy way of saying having a barbie with mates) and even on my bike. I tried every angle, exposure setting and focal length available. I just couldn’t get enough. Now I needed a plan to get my Phojo working. Here are a few Ideas that I hope will re-ignite your photographic fuse.

  1. Start a 365 project:
    Taking a decent photo every day may sound easy but a year is a long time that takes commitment, dedication and stamina to get the job done. Think of this as a photographic ultra marathon. Having a smart phone with a camera does help you take advantage of every opportunity or get a little compact with a decent optical zoom. I find the best way of staying on the case is to spread the word; tell as many folks that will listen, set up a Facebook page and upload your daily ditties, publish to sites like flickr.com, shutterfly.com and smugmug.com and invite comments from stranger and friends.

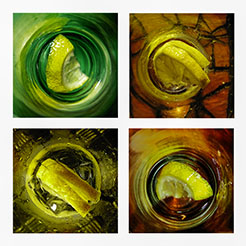
    1 - view of lemons in a glass

    Pointing your camera into glasses will yield interesting results

  2. Join a photographic club:
    The first thing I did when I arrived in Auckland was to join the North Shore Photographic Society, where I was immediately introduced to a varied bunch of photographers, whose interests ranged as widely as mine did. Having a monthly set theme that was sometimes way out of my comfort zone pushed me to explore new genres and subjects. Probably the most challenging part of camera clubs is entering work that will be critiqued by a judge who will provide feedback on areas for improvement. Visit www.photography.org.nz to find a club near you.

    2 - camera club set subject

    Regular set subjects will push you to explore new ideas

  3. Learn a new technique:
    It’s easy to get into a photographic rut repeating the same old, same old so learning a new technique can breathe new life into a stale approach. I tried my hand at pinhole photography, which is relatively easy to do with modern digital SLR. This falls into the same creative vein as impressionist and abstract techniques. Then there’s light painting, long exposure, street… the list goes on, but I’m sure you get my drift; the sky’s the limit here.

    3 - light painting

    Long exposure and light painting are fun to experiment with

  4. Travel to a new destination:
    Whenever I arrive in a new destination I can feel the creative juices bubbling and the best way to explore is to get out my camera and go walkabout. You don’t need to travel very far from home; even a trip across town or a new beach can awaken the slumbering genie. My best work by far has been created on ‘made for purpose’ road trips with like-minded people. Visit maps.google.com and stick a virtual pin the map, then hit the road.

    4 - tea seller in Istanbul

    Experiencing new cultures is very stimulating

    4 - Istanbul skyline

    View of Istanbul from a river cruise

  5. Buy, hire or borrow some new kit:
    Like different techniques, new kit can literally give you a new point of view and force you to re-look at your usual hunting grounds. I recently got out my 70-200 zoom lens while doing some landscape work. For someone who is fixated with the 17-40 wide angle peeper, this was a challenge for me. I found that I was now able to isolate and focus on little vignettes in the bigger scene.

    5 - wide angle view

    Wide angle view of the lighthouse

    5 - close up view

    Closeup view using a tele or zoom lens

  6. Volunteer for a local charity/group:
    I find that having a “client” that is expecting results from my shoot, adds the necessary pressure to get the job done, even if I’m not getting paid for the work. My recent outing was volunteering my photographic services to The Breast Cancer Foundation capturing new publicity images for future marketing campaigns. This is both rewarding and motivational and I had the best time ever. Check out volunteernet.org.nz and www.facebook.com/VolunteeringNZ or just put an ad in your local rag.

    6 - breast cancer foundation 2

    Being part of an event is exciting

  7. Set a project:
    I’m extremely goal driven so setting a project with a deadline works well for me. Your project could include entering a photographic competition, capturing the lifecycle of the ducks at the local park or documenting an event over a period of time. It’s easy to get side tracked along the journey, so documenting the expected outcomes and working out a roadmap to get there, should keep you facing the right direction.

    1 - still life study

    This was part of a project to turn household objects into photo art

  8. Emulate other photographers:
    Spending time enjoying other photographers work, can be both inspiring and motivational. As a fine art printer, I get to see many and varied images that feed into my own creativity, so it doesn’t have to be the work of famous photographers. Trawling internet sites like www.pinterest.com and www.flickr.com will fill you with awe and wonder at what’s possible.

    8 - inspired by Ansel Adams

    Inspired by Ansel Adams’ “Moonrise, Hernandez”

  9. Go out shooting with a mate:
    I had the great pleasure of hosting a fellow photographer from Cape Town over the festive season and delighted in sharing my favourite photography spots around Auckland with him. I do find it much easier to get out there and shooting when I have made a commitment to meet with someone else, especially early morning dawn patrol outings when the gravitational pull of the duvet is hard to escape.

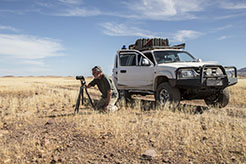
    9 - Peter Corbette in Namibia

    Road-tripping with Peter Corbett in Namibia

  10. Print your photographs:
    In this modern age of digital media it’s great to share your images on social media etc, but personally there is no better outcome to my myriad photographic journeys than seeing a print on the wall. For me, it’s a reward for the hard work and attention to detail. It doesn’t have to be large and expensive sometimes a small intimate print that’s well framed invites the view up close and personal.

So the next time you find yourself in a bit of a rut and your Phojo has gone on leave without you, try one of these methods. Remember, it’s like golf; it only takes one good shot to make you believe you can. Happy snapping.

Get out there and CREATE – PRINT – SHARE.