Photographing Your Artwork
You finally get THAT call. The call you’ve been waiting for. The call that’s going to change your life, make you rich, make you famous. It’s the owner of the gallery down the road and she wants to see YOUR artwork. Portfolio tucked under your arm, you race down the road and arrive breathless at “the Little Shop of Art” gallery. You wait around the corner until your rasping breath recovers to almost normal, run a hand through your hair and enter. The gallery owner looks through your portfolio with positive nods of the head and little throaty noises. She finally looks up with a broad smile and says she would love to show your work.” Yay, you think. “Can you send me over a set of digitals for the website and catalog by tomorrow!” she asks. “Sure thing” you reply nonchalantly. You head home walking on air. Suddenly it hits you. “Digitals?” You don’t have any. By the time you get home, you’ve hatched a plan. With artwork strewn across the floor and iPhone in hand you straddle the fruit of your labor and start snapping away. The pics look great until you zoom in and take a closer look. Bit blurry you conclude. Panic begins to set in. You call your mate with the DSLR to help out. He pops in and has a go. When you download the pics, the colour looks all wrong. Uuugh…
In this day and age of social media, online sales and marketing and print on demand, having a good quality set of digital images of your artwork is essential. In my profession I get to see some rather sad attempts at reproducing artwork so I would like to share some of the techniques I use on a daily basis. Good results can be achieved by either scanning or photography. In this scenario I am going to discuss photographing your artwork. To achieve the best results you will need the following; a decent camera, a good quality lens, a tripod and lighting.
- 1. Setup
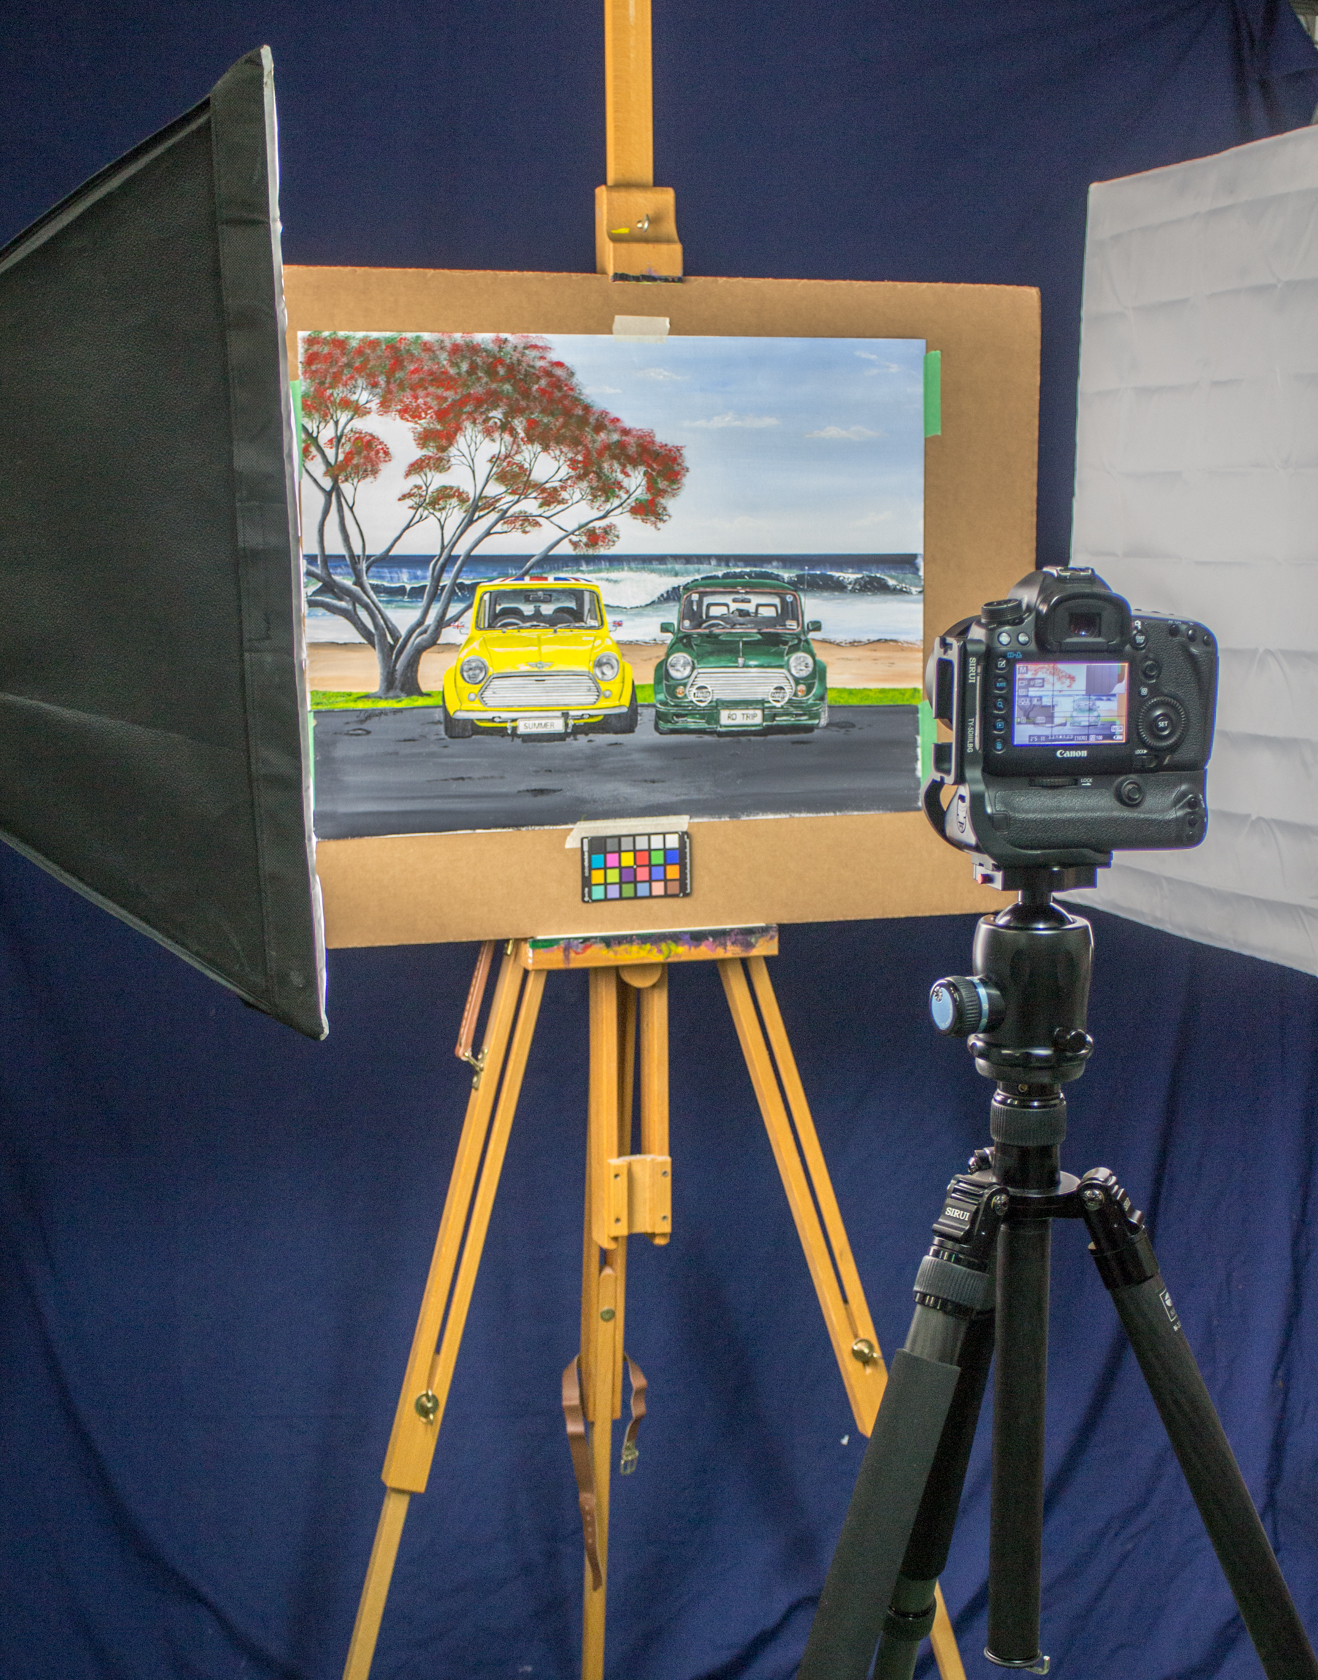
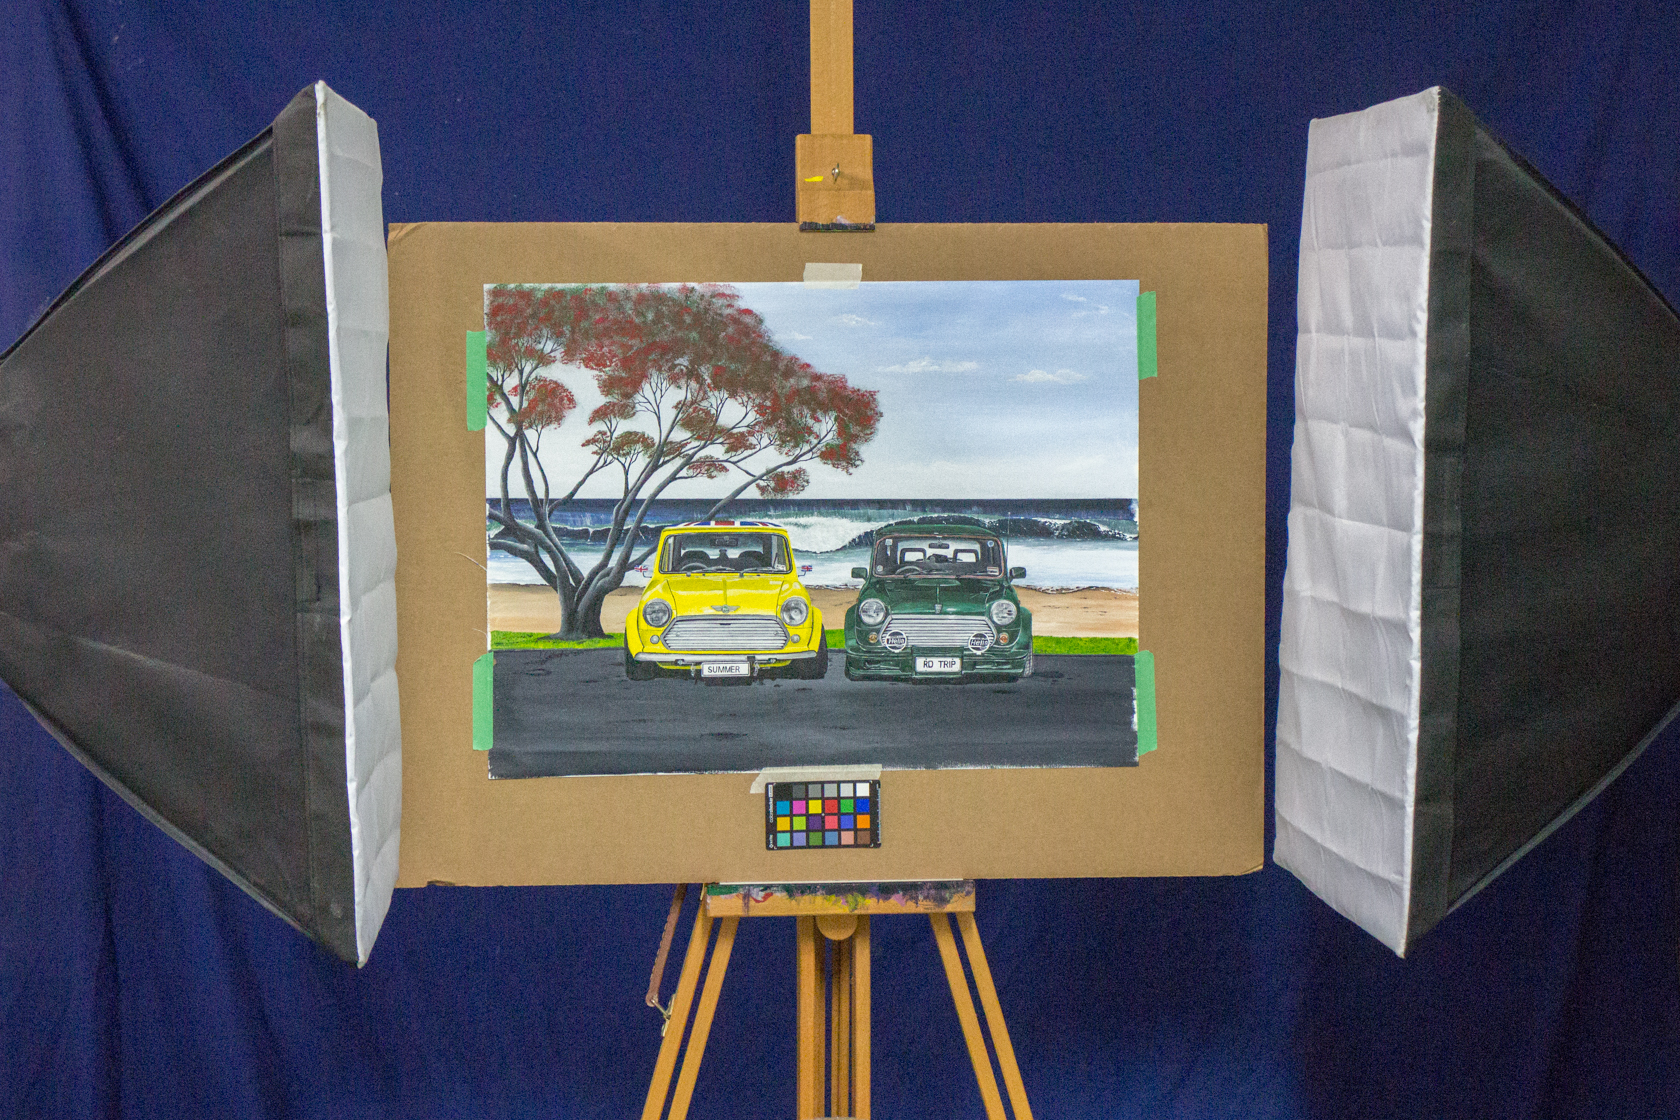
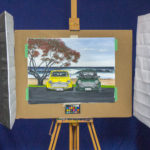 Let’s begin by looking at some ways to set up your artwork for photographing. It’s best to do this before the artwork is framed which introduces a number of challenges like shadows and weight. Place the artwork on a solid support like an easel, against the wall using blue tack or if you have a tripod with an extendable arm, you can place the artwork on the floor. It’s essential that it doesn’t move during exposure.
 - 2. Lighting
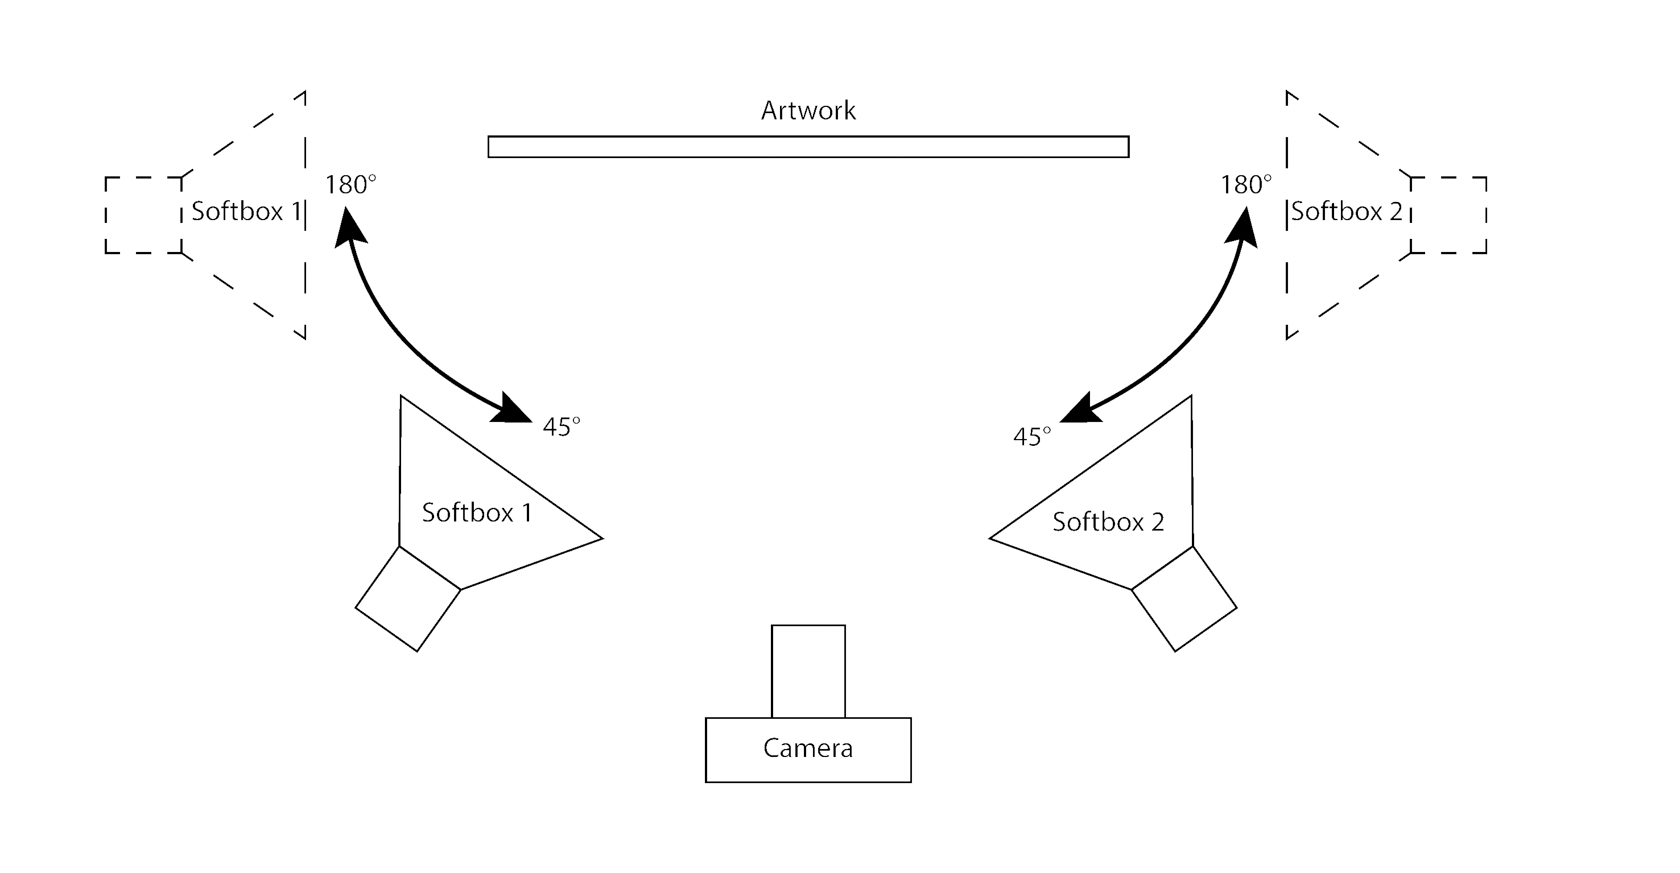
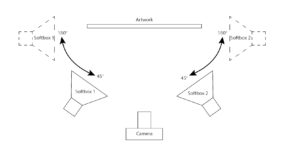 The ideal lighting scenario is having two diffused light sources that will be set up on either side of the artwork. If you are going to do this frequently, it may be worth investing in some softboxes with D50 CFL bulbs or some flash units. Alternatively, indirect daylight will work well. In this case we will be working with two CFL softboxes with D50(daylight-balanced) bulbs. Different substrates like paper and canvas will pose their own lighting challenges. To begin with, place the lights at about 45 deg to the artwork on either side of the camera. When working with glossy varnished canvas try moving the light to the side of the artwork and let the light wash over the surface to minimize reflections. Move the lights along this arc during setup until you achieve the best results.
 - 3. Camera, lens and tripod
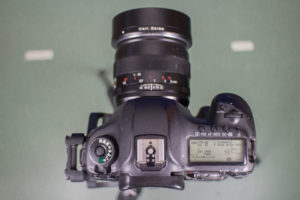
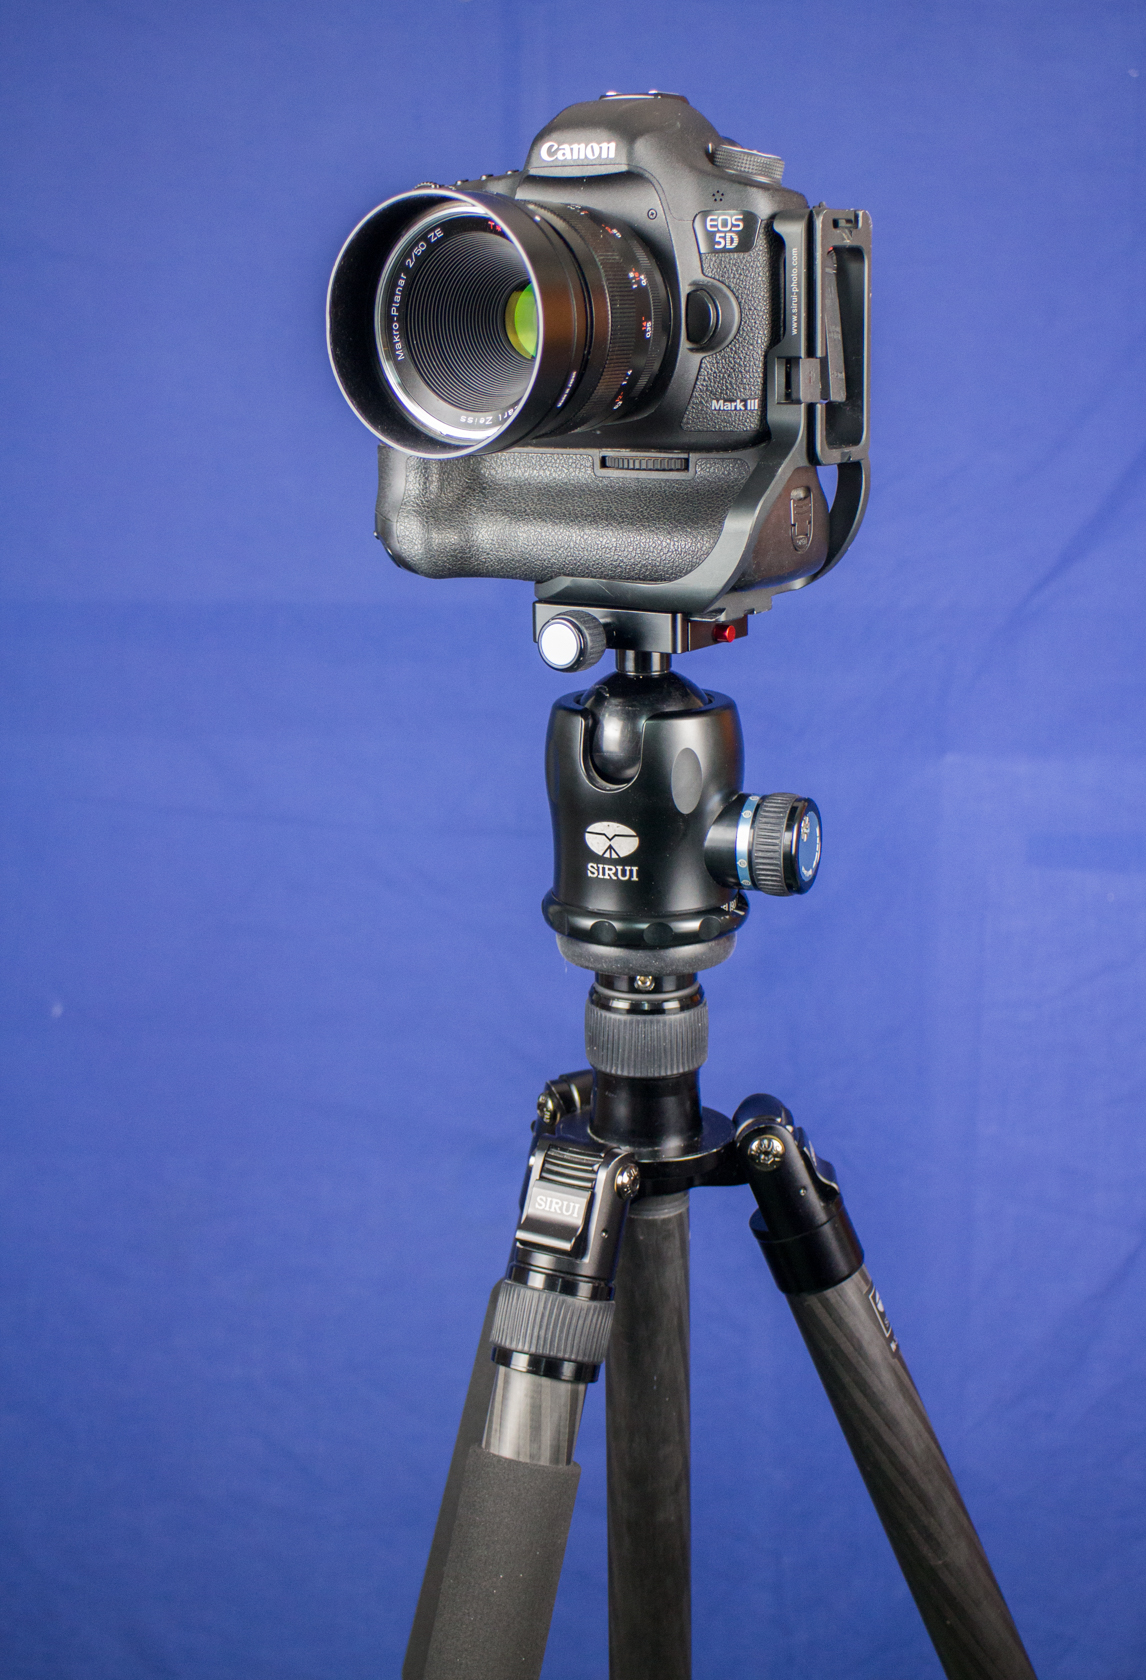
 Photographic equipment comes in all shapes and sizes and the price tag will rise to meet the quality. Always use the best option you have available. A point and shoot would be preferable to a Smartphone camera and a DSLR/Mirrorless would be even better. The lens you use is often more important than the camera and a 50mm to 85mm prime lens would work best. If however you only have a zoom lens, set the focal length above 50mm to minimise wide-angle distortion. Most lenses have an aperture sweet spot which is usually between f8 and f16(do a quick Google search to find yours). Always place your camera on a sturdy tripod when photographing artwork, as handheld shots will usually have signs of lens blur at closer inspection. With your camera mounted on a tripod make sure that the lens is parallel/square to the artwork to minimise the parallax errors. Frame the artwork so that it fills as much of the frame as possible.
 - 4. Settings
 Move the camera mode to A(aperture priority), set the aperture to around f11(or the recommended aperture setting from your Google search) and the camera’s ISO to 100. The higher the ISO settings, the more unwanted noise would be introduced. Most modern cameras have very good exposure meters, which in our case will determine the shutter speed, which will probably be quite slow (that’s why we need the tripod). Change the shutter release to timer mode (2 sec should be enough), this will reduce lens shake when you take the picture. To achieve the best results, your camera image quality should be set to the highest available; if it’s a DSLR/Mirrorless camera select RAW, else set it to the highest and finest jpeg resolution available. Finally set the white balance to auto mode. Set the lens to manual focus and magnify the preview screen to MAX and adjust the focus ring until everything is sharp.
 - 5. Working with colour
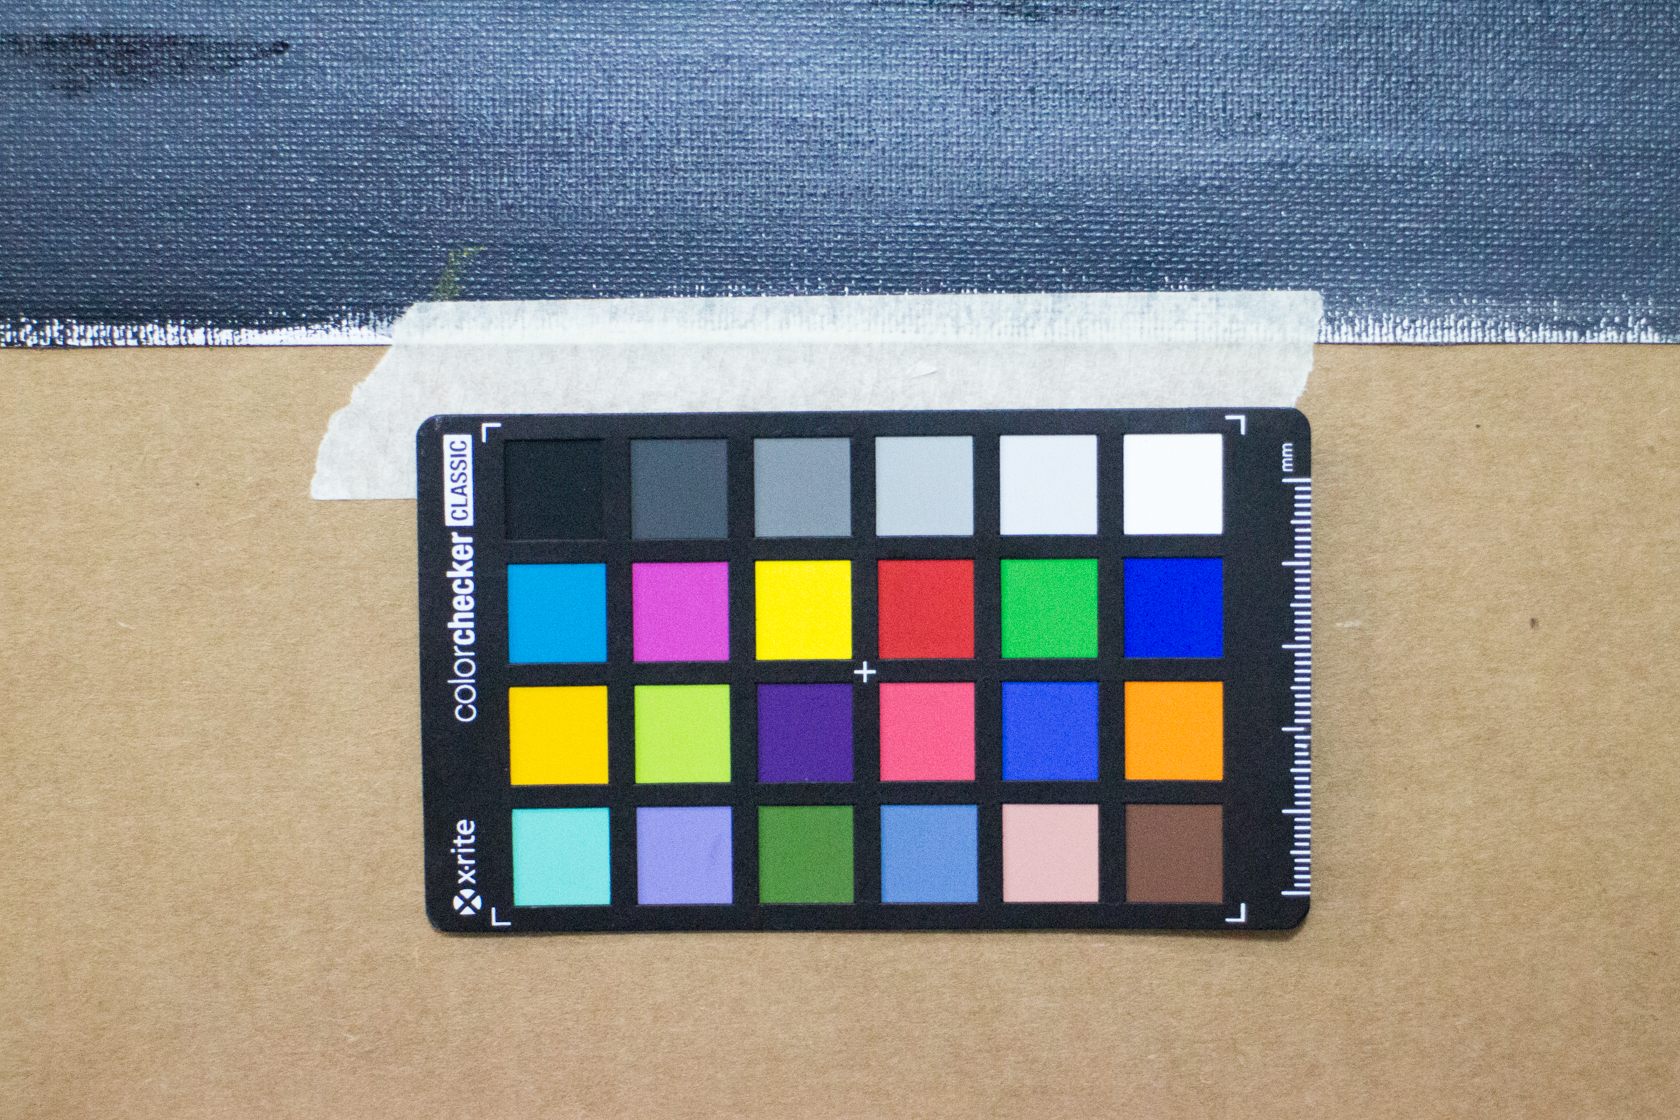
 The quality and colour of the lighting you use will have a great impact on the digital quality of your artwork. Even with the camera set to Auto White Balance, there will be a slight shift in colour. The best way to mitigate this is to use a 50% grey card or a X-Rite Color Checker, which can be purchased from most good camera shops. Take a photograph of the grey card/ X-Rite Color Checker at the start of every session using the exact same lighting and camera setup to be used later for colour correction.

I hope that these tips will get you on the right path making good quality digital images of your precious artwork. In the next part I will discuss the processing of the digital file.
Please feel free to email me on info@printart.co.nz if you have any questions.