By John Botton APSNZ
Most photographers I print for often ask for tips on how best to prepare their images for print. In reality, good prints start before you even hit the shutter button. Unlike the simplicity of good old film workflow, digital photography comprises a myriad interdependent systems and settings to achieve the desired output.
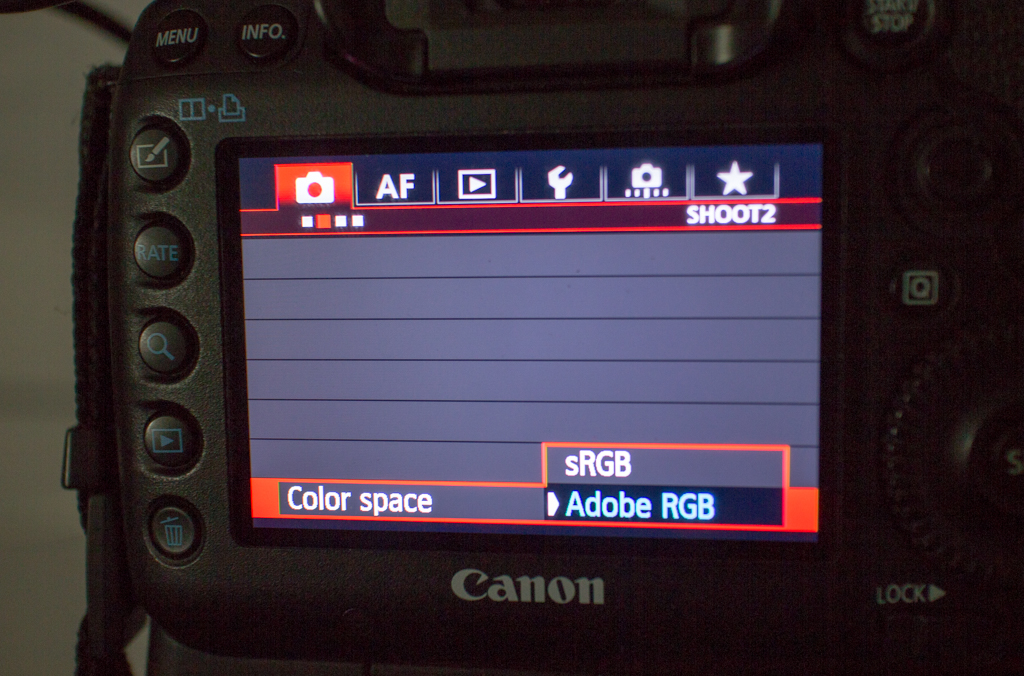 Lets begin with the origination, your DSLR camera (this may also apply to smart phone cameras in the future). Go into the menu settings for the camera and find the reference to “colour space”. You should have two options here, sRGB and Adobe RGB. Make sure you have Adobe RGB selected.
 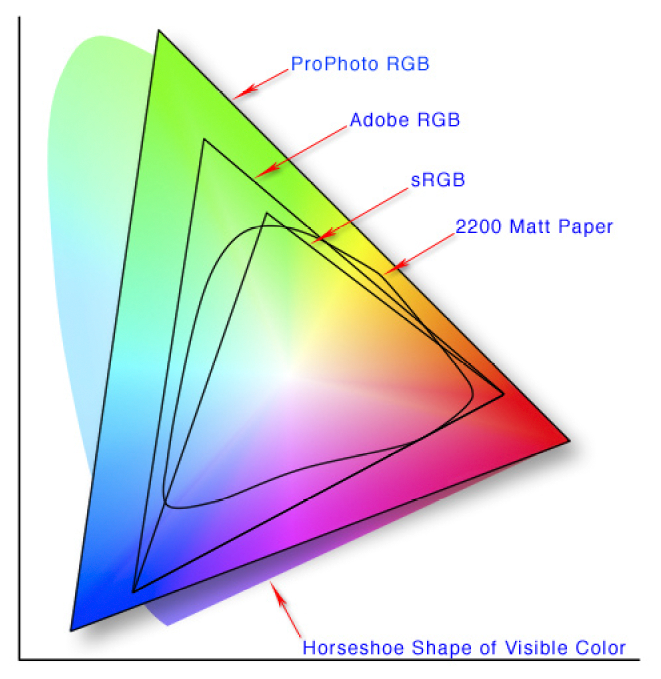 But what’s the difference you may well ask, having just shelled out a gazillion dollars for your new camera that should do everything perfectly. If you refer to the image, you’ll notice that fundamentally these refer to the amount of colours that these colour spaces can resolve. Now scoot over to the file format setting and make sure your shooting in RAW capture. You definitely want your image file to contain as much information as possible so stay away from shooting in JPEG. Unless, that is, you shoot only for the digital space like the Internet, web or social media then leave your colour space set to sRGB and just ignore the rest of this article. For the rest of you, read on.
Also see: There’s More to Colour Than Meets The Eye
Before you capture your image, take the time to get your composition as close as possible to what your end image will look like. It’s no use having a large sensor capable of capturing 20MB files if your going to crop down to a fraction of the image you’ve taken and then expect your print to pop with detail and not be pixelated. Get to know your camera and lenses by experimenting with different settings and combinations. Don’t wait until you have spent loads of cash and time getting to an awesome landscape opportunity to start experimenting. Get out into your local neighbourhood and do a systematic incremental exercise of aperture settings for each lens in your bag and study the results critically. Get a friend to give a second opinion if you’re not sure. Every lens has a sweet spot, especially for landscape work.
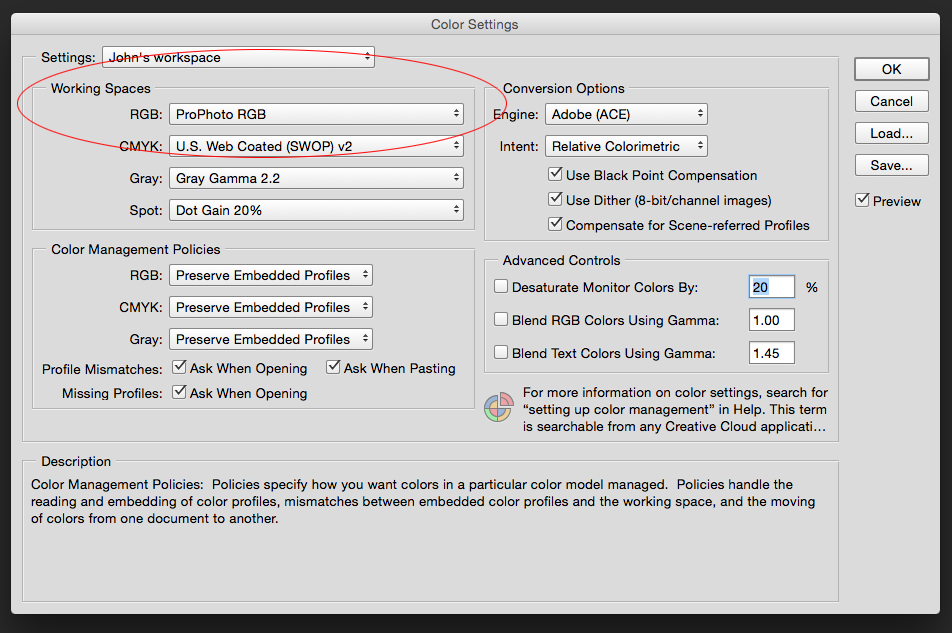
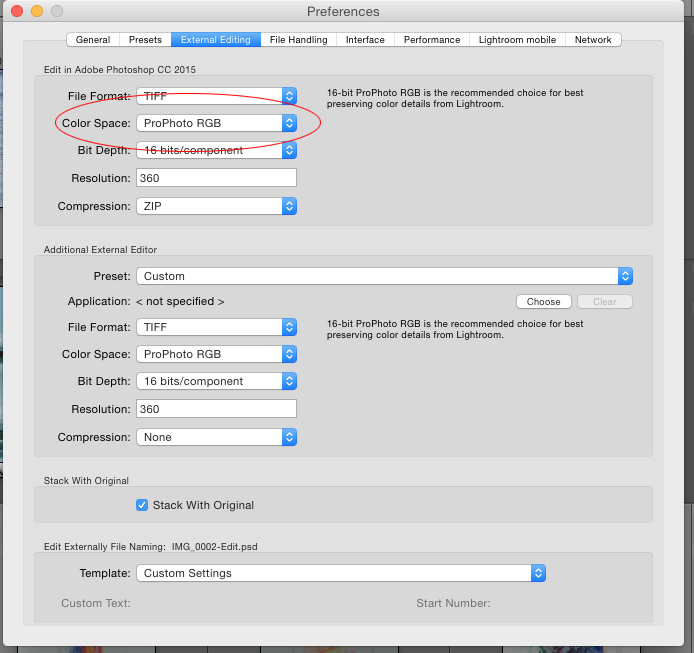
 With exciting advances in paper coating technologies and inks, modern printers are now able to resolve a much larger colour gamut which is made possible on most fine art printers by using up to twelve colour inks. But wait a moment; we’re jumping the gun a bit here. Lets take a look at your post click colour workflow starting with your image processing software. Check the user guide/manual to find out where you can change the colour space. OK, go there and make sure it’s set to Pro Photo. Now head over to your image editing software(if that’s different) and do the same. Now make sure your monitor is correctly calibrated so that what you see is what you hope to get… refer to my article on colour workflow. Now that you’ve made sure that your software isn’t inadvertently going to compress or alter the colours in your image file, lets take a look at preparing for print.
Start by doing as much processing on the RAW file as possible. This can be either you camera’s native RAW format or the file can be converted in the DNG(digital negative) format which is becoming an accepted standard. That means making as many changes as possible in Lightroom or whatever you may use before you start messing with the actual pixels. Editing the RAW file is non-destructive and has no direct effect on the underlying image file while editing a pixel based file can be described as destructive as the information that makes up the image is re-arranged and saved according to the changes you have made. When you are done making changes, export your image at the final print size and set the resolution to 300dpi. Don’t do any sharpening during the export process as you have no direct control over what the “black box” is doing to your image. Save the image as a .TIFF file and rename it as “file name – print” or whatever makes sense to indicate that this is your print out put file. Including details like file size in then name will help jog your memory in future and also communicate information to the person doing the printing.
If you are going to be working on your image in your favourite editing software, make sure that you are not saving the file in a compressed format like JPEG. Stick to either .TIFF or .PSD or similar. If you are using Lightroom and need to do additional editing, you can take your images into Photoshop as smart object that allows you to make non destructive edits that do not directly affect the RAW file. After completing your final edit, save a backup copy of your file in .TIFF format and rename it “file name – print final.tif” or something that will indicate that it’s the final print output file. Always remember to flatten any layers to ensure that no unwanted changes occur when the file leaves your control. If you are not doing your own printing, don’t do any print sharpening or soft proofing, leave that to the print operator.
Your image is now finally ready for printing. Yippeee! So, as you can see, a great print starts when you’re out there, perched on the edge of the world, freezing your butt off, waiting for the light. Get out there and CREATE – PRINT – SHARE.
www.printart.co.nz